
DIY Fireplace Makeover & Building Bookcase Built ins
It’s the story of our fireplace bookcase built ins! This post is long with lots of photos, if you love DIY then you will love this :). There is a mix of in progress iphone photos along with final finished product photos at the end.
From the moment I first saw the listing for our current house it was love at first sight. I remember being at a play date down the road and thinking I really liked their house so I pulled up realtor.com to see what was in the area. A beautiful listing on Bayberry Lane popped up, it had been on the market for 3 days and was beautiful. David had been advocating for a new house since our first home was pretty tiny and if we wanted to add any more babies we needed more space. I had a list a mile long of must haves. Front porch, fireplace, lots of windows, long driveway that makes people wonder what’s at the end of it, oh and the garage doors could not face the front. Yes I know that is super picky but I hate pulling up to a house and the first thing you notice is the garage. I think our realtor wanted to kill me on that one because it was a non-negotiable! This perfect house on a street with the sweetest name fit all my criteria and more!

The before of our family room from the house listing. Cream carpet, brick fireplace and lovely flat pinky beige paint on the walls. A new wall color is next on the list, I’m leaning towards Stonington Gray by Benjamin Moore!
Most important was that it was done enough to live in comfortably but not so done we couldn’t make our mark on the place. Two babies have slowed down my DIY ways but they haven’t squashed them entirely. When I saw the family room all I could think was how perfect built-ins would look surrounding the fireplace which also totally needed an upgrade.

My Pinterest board inspiration for this project! I count 15 fireplace bookcase built in pins right here :).
I really kicked this project off by hitting Pinterest with a passion, I pinned any fireplace book case and built in combination I could find. I counted over 50 pins just related to fireplaces on my entire board. I looked closely at everything from how the hearth was done to where the flooring transitions were in relation to cabinets. You can check out my actual board here – The Home : Living Room. I pulled out graph paper and sketched out many many many versions of designs and finally landed on the one below! You can get an idea for what Phase 4 will be by looking at my sketch ;).

My beautiful sketch of what the whole thing will look like someday! All that is left is the portion over the fireplace to frame out the tv.
Now onto some befores! Doncha love my tape lines as I was figuring out sizing and placement of everything :). I’m pretty sure I can file this under Hot Mess! One part I did not photograph was tearing out the brick hearth, the one part of the project where we thought we might not pull this off. It did not want to come loose and we needed to make sure we didn’t damage the structure of the bricks above. Turns out they weren’t full bricks but veneers over a metal casing. David had some issues getting the metal casing cut but finally we succeeded and could move on to the floors.

Pre-renovation on the left. Cream carpet plus 2 boys with leaky sippy cups and 2 dogs equals NASTY!!! We were so happy to rip that carpet out!
Turns out laying hardwood floors isn’t so bad! Unfortunately with kids you have to stop around bedtime because swinging a hammer onto the nailer will keep waking them up! We went with a handscraped Acacia wood floor from Lumber Liquidators. Sadly we’ve only had this flooring for about 6 months and the dogs and kids have gouged it pretty good in areas. We have zero plans to re-do it so area rugs will protect it for awhile and eventually we will get it sanded and refinished again once the boys are off to college ;). It is super pretty where it isn’t scratched though! We also picked up an air compressor and nail gun for this project which I LOVE!!!! I just want to build stuff so I can use them over and over again!

Someday we will look back on these photos and think about how small these guys were during this project! Will was passed out after a bee sting and a dose of Benadryl. Rob enjoyed overseeing the job ;).
I’m not sure there is any tile more beautiful than 18×18 marble, it makes my heart flutter! We got all our tile from a local store called the Tile Shop. I was picky in that I wanted 3 full tiles and then we cut the ends shorter to fit the space. You can see a large gap where we didn’t put any tile because I knew it would be covered by the fireplace surround. We beefed up the fireplace by extending it around 8″ on each side with columns.

Floors laid and tile set waiting on grout!
Next came planning for the tile surround and figuring out cuts. We rented a tile saw for a day and I wanted to make sure we knew what to cut to get started quickly. We opted for 12×12 sheets of smaller subway style tile because it seemed much easier to me to layout a 12×12 sheet vs 15 individual tiles. I relied heavily on Young House Love’s post on redoing their fireplace! God I miss them, am I the only one that felt like a family member died when they closed up shop. I mean I get it, I have two young kids so I totally get it but I miss them!!!

My fancy way to figure out how my tiles were going to fit and what would need to be cut. Plus my fancy measuring stick aka my finger for getting the right size picture frame moulding from Lowes.

This shot is probably the best to help you understand what I meant by building from scratch from MDF and trim. The dark brown is the plain MDF boards and the lighter tones are the wood trim I attached. White paint tied it all together!
As you can see in the photos below we really made the fireplace stand out more and magically shrunk our television! I find this ironic because we just got this tv about a year ago and kept saying how massive it was when we installed it and now it looks small. The beefed up mantel meant I could decorate for Christmas this year! The previous one was way too narrow to fit anything.

A little Instagram before and after with my boys and then a shot of Christmas morning. You can see the Ikea expedit unit we were previously using for all the electronics. That has now been re-purposed on its side as toy storage across the room.
A little during shots as it all came together. You can see the lattice trim I added before painting to beef up the look of the bookcases. I got that idea from Centsational Girl – Billy Bookcases! My local store didn’t have as wide of lattice as she used but it still worked fine. You can really see how the cabinets were just plain boxes until I fancied them up with trim!

As you can see someone likes to play in the fireplace and on this particular day he got the soot EVERYWHERE! I’ve learned that being a parent means stopping, taking a photo as you count to 10 to calm down and then cleaning things up.

My little helper vacuuming up the MDF dust as I made some pocket holes :).
Finally here is the final product! I painted the backs with a dark navy blue color that was similar to Stunning from Benjamin Moore.

Ahhhhh, I just love to look at it! It makes me smile :). I’m the daughter and grand-daughter of two carpenters and I built the entire fireplace surround and bookcases with MDF, trim and tools passed down to me from my dad and grandaddy. I managed to impress both those men with my skills too!

Still working on the decor of the built ins but that is the fun part that can take time!

While pinning ideas on Pinterest I was totally falling in love with chunky Craftsmen style mouldings. Then I took a step back and paid more attention to the style our home currently has. Our foyer, staircase and formal dining room all feature traditional picture frame wainscoting trim. Trying to force chunky Craftsmen trim into the family room just wasn’t going to flow. So instead I embraced our home’s current style and mimicked the trim work on the new built ins! Now they really look like they are original to the home and not added 20+ years later!

That top shelf is for David to display Melissa approved items. Yes I’m that picky wife, I’ve vetoed racing trophies already.

I love the crown moulding detail we added to the tops of the bookcases. I really want to get some tall chunky wooden candlesticks to go on the mantel in place of the vase I have there now. Target and Homegoods here I come!!!

How pretty is that mantel?!?!?! I just wandered up and down the trim aisle at Lowes looking at the different pieces and figuring out what would work for me. I really paid no attention to the actual suggested use for the trim pieces and instead paid attention to the profile of the trim. We created the mantel with crown moulding and a 1×12 board. Then I added additional moulding to finish the look!

In a turn of fate at Christmas my mother in law was asking me what my plan was for the built-ins regarding shelves. I told her my idea and she just smiled and nodded, I had no idea that she had a plan herself ;). When we opened our Christmas presents I was delighted to see these two very cool old lamps featuring red and green lights on the bottom to represent port and starboard! Plus they had custom lamp shades made with maps of the Potomac River where we sail. These are the best lamps ever! Even better is that they came from my husbands grandfather and he remembers playing with them when he was a kid. I cannot even describe how much I love that, the memories for him, the history they represent, it makes me so proud to have these grace our built-ins!

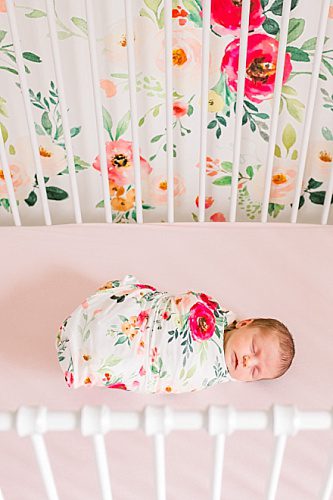
Now I have the perfect place to display our beautiful albums from the boys newborn sessions! One for each built-in :). Check out our snazzy starboard light too!

All of this was created with 3/4 MDF and various trim. I used lattice trim to beef up the bookcases and it really made a difference in making them look chunky and substantial. Even David was impressed when he came home that day and saw what I had done ;).

Yes I even trimmed out the sides! It was just too plain otherwise and I didn’t want any part of these guys to look plain. Simple maybe but never plain ;). You can also see our current cord hiding method, let’s just say that is still a work in progress and will probably be completed with Phase 4 of this project.

I picked gorgeous 18×18 inch tile for the hearth and let me tell you finding a saw to cut that large of tile was a PIA! We rented one and it died so we rented a smaller one and it couldn’t make the large cuts we needed. We ended up at Lowes with a very nice tile associate who cut it for us into the strips I needed. I saw him the other day and almost showed him a finished photo but I figured he wouldn’t remember us, lol! In the photo on the right you can see the tile we used to finish the edges of the fireplace. I found them via a pin on Pinterest of a finished fireplace I loved – link here. Seriously without Pinterest I don’t know what I would have done. I loved gathering ideas and taking bits from different designs and creating something unique for us!

David keeps telling me that the reason I’m having rotator cuff problems right now is because of excessive patting myself on the back moments. Since this blog post is basically a giant pat on the back I’ll just go with it! See that terribly photographed angle on the right of the top of our bookcase crown moulding. Sorry I know it feels like you are falling looking at it. Anyway that is where the crown met our sloped ceiling and I was able to cut our crown freehand to fit it perfectly plus get my angle correct on the corner at the other end. That achievement right there deserves like 5 pats on the back even if I did go through 8ft of crown to get that cut right ;).

I might have stolen (with permission) that garland from Amanda Veronee’s last floral workshop ;). I fell in love with it and knew I wanted to pretty up my fireplace with it. Months later and it is most definitely dead but I love it so much I don’t want to take it down :(.
Here is a peek at another living room project we have going on. It’s not completely finished yet but I’m already so happy with what it represents for us! The boys will stand on the chair and point to the photos and talk about the boat, I love it!

This wall gallery is the perfect project for a family room! I’ll post more details about it later but just to give you a quick idea these frames hold snapshots from our time on the boat last summer. They are all iphone photos taken as we took various trips. My plan is to update them every year with new photos of that years travels. I want this to be a living gallery reminding us of our adventures!